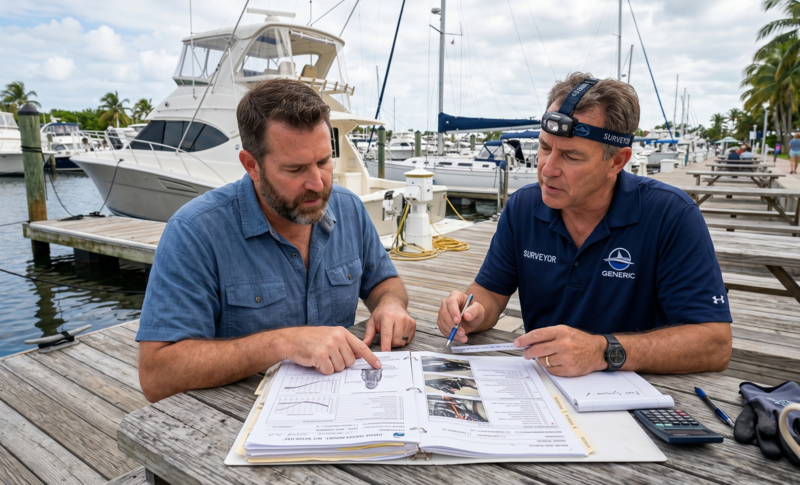
TL;DR: A solid used boat inspection covers structure, mechanical, electrical, safety, cosmetic, and paperwork in that order. You can do most of the visual checks yourself in 90 minutes with a flashlight, a moisture meter rental, and a phone camera. Bring a marine surveyor for anything over $20,000 or anything you can't see with the boat in the water.
A used boat inspection is the physical and documentary walk-through you do before money changes hands, designed to surface the expensive problems before they're yours. The pleasure of finding a great deal on a used boat evaporates the first time you spend $4,000 on a transom repair you didn't know was coming. The way to make sure that doesn't happen is to know what to look at, in what order, and what each thing tells you. None of this requires a marine engineering degree. It does require taking your time, asking the seller to step away while you look, and trusting the small signals your gut sends when something doesn't add up.
This checklist walks through 25 specific things to check, organized by category, so you can run a real inspection in about an hour and a half. It assumes the boat is on a trailer or in dry storage and at least partially accessible. If the boat is in the water and the seller won't haul it for inspection, that's a red flag of its own.
Before you arrive
Pull the basic paperwork
Ask the seller for the Hull Identification Number (HIN) by email before you drive out. The HIN is a 12-character code that starts with three letters identifying the manufacturer and ends with a build-month-and-year code. Run it through the Coast Guard’s online recall lookup. If the HIN is missing, ground off, or doesn’t match what the seller claims, walk away.
Also ask for the year, make, model, and last few maintenance receipts. A seller who can’t or won’t provide this is telling you something.
Check the title and lien status
Ask whether the title is clean and in hand. If there’s a lienholder still on the title, the seller has to coordinate payoff at closing. That’s normal, just plan for it. If the seller can’t tell you whether there’s a lien, the inspection is premature; resolve the title question first.
Structural inspection (the expensive stuff)
1. Walk the hull and check for stress cracks
Stand back twenty feet and look at the hull profile. Then walk close and run your fingers along seams, the transom, and the area around through-hulls. Stress cracks look like fine spider lines in the gel coat. A few small ones near the bow or around fittings are normal for an older boat; a dense network anywhere structural is a warning.
2. Sound the deck for soft spots
Walk the deck slowly. A solid deck sounds like a solid floor under your weight. Soft spots sound dull, give underfoot, or feel spongy. Soft decks usually mean water has gotten into the core and rotted the foam or balsa underneath. Repair runs $1,500 to $5,000+ depending on size.
3. Tap the transom
The transom is the back wall of the boat that holds the outboard. It absorbs every horsepower the engine produces. Tap it with the side of your fist or a small rubber mallet, top to bottom. Solid transoms sound consistent. Hollow or dull sounds suggest water intrusion or core rot. A bad transom is a $3,000 to $8,000 repair and a non-negotiable deal-breaker on most used boats.
4. Check the stringers if you can see them
Pull up the deck plates and look at the stringers, the longitudinal beams that run the length of the hull. They should be intact, dry, and free of cracks. Soaked, cracked, or visibly rotted stringers are structural and expensive.
5. Inspect the keel and chines for impact damage
If the boat is on a trailer, walk underneath. Look at the keel and the chines (the edges where the bottom meets the sides). Scrapes are normal. Gouges, repaired-and-faired sections, or cracks suggest hard groundings that may have affected internal structure.
6. Look for blistering on a fiberglass hull
Bubbles in the gel coat below the waterline are osmotic blisters caused by water working through the gel coat into the laminate. A few small ones are cosmetic. A widespread field of them is a several-thousand-dollar bottom job.
7. Test for moisture in the deck and transom
Rent or borrow a moisture meter for $30 a day. Test the transom around the outboard mount and the deck near every through-hull and stanchion base. Readings in the green zone are fine. Yellow or red readings mean water inside the structure, and the next conversation is about how much it costs to dry out and repair.
Mechanical inspection
8. Look at the engine and listen for what’s not there
Pop the engine cover. Look for clean wiring, no melted insulation, no rust on the powerhead, no obvious oil weeping from gaskets. The engine doesn’t have to look new. It does have to look maintained.
9. Check the engine hours
Modern outboards have hour meters. Ask for the number, then check it against the maintenance records. A hundred hours a year is typical for a recreational boat. Tournament fishermen run 200-400. Commercial guides run 800-1,200. Match the hours to the seller’s story.
10. Run a compression test
Have a marine mechanic run a compression test on every cylinder. Each cylinder should read within 10% of the others. A cylinder with low compression has internal damage that’s either expensive to fix or about to get worse. This is $75 to $150 well spent.
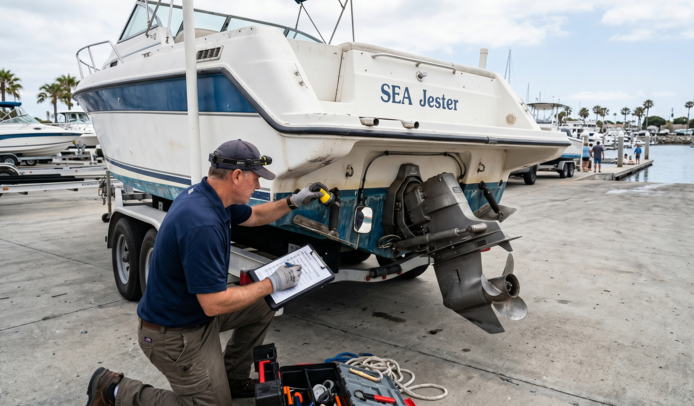
11. Inspect the lower unit
The lower unit is the part of the outboard below the waterline. Pull the prop and look at the propshaft for fishing line, damaged seals, or weeping oil. Have the mechanic pull the lower unit drain plug and look at the gear oil. Milky oil means water has gotten into the lower unit, which means seals need to be replaced and there may be internal damage.
12. Test trim and tilt
Tilt the engine fully up and back down. Run the trim through its range. The motion should be smooth and quiet. Grinding, slow movement, or unusual noise points to a failing trim pump or hydraulic system, which runs $800 to $2,000 to fix.
13. Check the steering
Turn the wheel lock-to-lock. Smooth, even resistance is what you want. Stiff spots, grinding, or excessive play are signs the steering system needs service or replacement. Hydraulic steering systems can leak; cable steering systems can corrode. Either fix is $400 to $1,500.
14. Inspect the fuel system
Look at the fuel lines for cracks, brittleness, or seepage. Check the date code on rubber fuel hoses. Hoses over 10 years old should be replaced. Look at the fuel tank if accessible – corrosion or signs of repair are warnings. A new aluminum fuel tank is $1,500-$3,000 installed.
Electrical and electronics
15. Open the battery compartment
Batteries should be clean, secured, and labeled for what they power. Corroded terminals, batteries sitting loose, or melted-looking cabling are all warnings. Check the battery dates – most marine batteries last 4-6 years.
16. Test every switch on the panel
Sit at the helm with the battery on and run through every switch on the breaker panel one at a time. Nav lights, anchor light, bilge pumps, livewells, horn, gauges, electronics. Everything should work. Anything that doesn’t is either an easy fix or a sign of larger electrical issues. Have a multimeter on hand if you can read one.
17. Look at the wiring behind the dash
Pop a dash panel or look behind the helm. Wiring should be bundled, labeled, and routed away from heat sources. A bird’s nest of unlabeled wires, scotch-locks, and exposed butt connectors means someone hacked something together, which means future problems.
18. Inspect the electronics’ age
Look at the chartplotter, sounder, VHF, and stereo. Marine electronics typically have a useful life of about 8 to 12 years before they’re obsolete enough to need replacement. A 15-year-old sonar isn’t worth anything; treat it as part of the deal you can negotiate against.
Safety and through-hulls
19. Open every seacock
Every through-hull below the waterline should have a seacock (a manual valve) you can open and close. Try every one. Stiff or frozen seacocks are common and either need to be exercised back into service or replaced. A failed seacock can sink a boat at the dock.
20. Check the bilge
Look at the bilge with a flashlight. A little water is normal. A lot of water, or water with an oily sheen, fuel smell, or recent stain lines points to leaks, spills, or constant intrusion. Stained sides on the bilge tell you how high water has gotten in the past.
21. Verify the safety equipment
Coast Guard requires properly fitted life jackets for every person, a throwable PFD, a fire extinguisher within date, sound signaling, and navigation lights. Use this as a pretext to look at how the safety gear is stored and whether it’s been replaced or neglected.
Cosmetic and creature comforts
22. Test cushions, canvas, and upholstery
Mildew, tears, broken zippers, and faded canvas tell you whether the previous owner kept the boat covered or left it open to the weather. Replacing a full set of cushions runs $1,500 to $4,000 for a mid-size boat; full canvas, $2,000-$5,000. Subtract from your offer.
23. Check the head if there is one
Flush the head a few times. Look for fresh-water and waste-water tank capacities and condition. Holding tanks with cracks or smells are an unpleasant repair. Sanitation hoses over 10 years old need replacement regardless of visible condition.
Trailer and paperwork
24. Inspect the trailer
If the boat comes with a trailer, walk around it. Look at the frame, axle, springs, and bunks. Check the tire date codes (on the sidewall: a four-digit code where the first two digits are the week and last two are the year). Trailer tires over five years old need replacement regardless of tread depth. Verify the trailer title is in hand and matches the trailer VIN. A neglected trailer is a $1,000-$3,000 repair waiting in your driveway.
25. Run the paperwork
Confirm the title is clean, the registration is current, the maintenance records align with the seller’s story, and the HIN matches the title and the boat itself. Get a bill of sale template ready. If financing, get the loan amount and terms in writing before you commit. You can use Boatzon’s boat loan calculator to model payments on the actual purchase price before you negotiate, and Boatzon’s marine financing options span new and used purchases at competitive rates.
When to call a marine surveyor
A do-it-yourself inspection catches the obvious. A marine surveyor catches the non-obvious. For any boat over $20,000, any boat with structural concerns from your visual check, or any financed purchase (most lenders require a survey), bring a surveyor. The cost is typically $15-$25 per foot of boat length, so a 25-foot boat is $375-$625. That’s the cheapest insurance against a $10,000 mistake you’ll ever buy.
The same goes for insurance: many marine insurers won’t write a policy on a boat over 10 years old without a recent survey.
What to do with what you find
A few small issues are normal. Use them as negotiation leverage, not deal-breakers. A boat with three or four cosmetic flaws and clean structure is usually a reasonable buy at fair market price. A boat with structural concerns, a documented hard grounding, or any evidence of submersion is rarely worth the gamble even at a discount, because the unknowns tend to cascade.
If you’re unsure how to read a specific finding, the BoatUS inspection guide for older boats is one of the most readable resources on the topic.
FAQ
How long should a used boat inspection take?
Plan on 90 minutes to 2 hours for a thorough self-inspection of a mid-size used boat. A professional marine survey takes 3 to 5 hours, including a sea trial. Don’t rush either one.
Should I get a marine survey on a used boat?
For any boat over about $20,000, any boat with structural concerns, and any financed purchase, yes. Surveyors catch issues invisible to a buyer who hasn’t seen 500 boats; their fee (typically $15-$25 per foot) is small insurance against a much larger surprise.
What’s the most common expensive problem on a used boat?
Transom rot and stringer rot tied for first place, with lower-unit corrosion close behind. All three are expensive ($3,000+) and all three can be detected with a careful inspection before purchase.
Can I do a sea trial without buying the boat?
Most sellers will allow a sea trial as part of a serious purchase offer, often after a deposit. A sea trial is critical for testing the engine under load, the steering, the trim, and the electronics in real conditions. Don’t buy a boat you haven’t run.
What’s the difference between a survey and an inspection?
An inspection is your own walk-through. A survey is a written report from a credentialed marine surveyor that lenders and insurers will accept as valuation and condition evidence. Both have a place; they’re not the same thing.
What if the seller refuses to let me inspect or survey?
Walk away. A reasonable seller has nothing to hide and welcomes a thorough look. A seller who pushes back is either inexperienced or hiding something.
How do I check a boat’s HIN?
The Hull Identification Number is engraved into the transom on the starboard side, above the waterline. It’s a 12-character code. Run it through the U.S. Coast Guard’s online recall lookup to check for safety recalls. Compare it to the title to confirm they match.
What’s a fair price for a used boat after inspection findings?
Subtract the cost of the repairs you’ve identified from the asking price, then negotiate from there. A boat needing $3,000 in cushions, $400 in trailer tires, and a $1,500 lower-unit service should sell for at least $4,900 below comparable boats in turnkey condition. The seller doesn’t always agree; that’s why it’s a negotiation.